How to Build a Food Trailer
Thinking how to build a food trailer from scratch is a fun way to start a mobile food business. You have full control over your design, layout, and branding. Building a food trailer is important for success. This applies to both experienced chefs and new entrepreneurs.
In this guide, we will explain each step. We will cover planning, budgeting, construction, and final inspections. This way, you can start your journey with confidence.
Step 1: Research and Planning
Before you begin any construction, planning is everything. Building a food trailer is not just about putting up walls and equipment. It’s about making a workspace that works well and follows the law for your business needs.
Key considerations in this phase:
- Define your food concept: What type of food will you serve? Your menu will determine your equipment, layout, and storage needs.
- Know your market: Research your target audience and local competitors.
- Check regulations: Every state and city has specific health codes and vehicle requirements for food trailers.
- Budget realistically: Building a food trailer can range from $15,000 to $100,000 depending on size, materials, and equipment.
Step 2: Choose the Right Trailer Base
When learning how to build a food trailer, selecting the right trailer base is a critical step. You have two main options:
- Buy a pre-owned trailer and customize it.
- Purchase a brand-new empty trailer shell built for food service.
Factors to consider:
- Size: Common lengths range from 12 to 28 feet.
- Weight capacity: Must support your equipment without exceeding towing limits.
- Material: Aluminum is lighter and rust-resistant; steel is stronger but heavier.
- Condition: If used, inspect for rust, dents, or frame damage.
Step 3: Create the Layout and Design
Your trailer layout must be efficient, ergonomic, and compliant with health regulations.
Best practices for food trailer design:
- Workflow efficiency: Arrange equipment so that food prep, cooking, and serving areas flow naturally.
- Customer service window: Position it for easy access and customer interaction.
- Storage solutions: Include enough dry storage, refrigeration, and utensil space.
- Ventilation: Install a proper hood system for fire safety and air quality.
💡 Tip: Work with a professional designer or builder who specializes in food trailers to ensure compliance with state codes.
Step 4: Gather the Required Permits and Licenses
Even before you begin construction, check with local authorities to understand what permits are needed.
Common requirements include:
- Health department approval for layout and equipment.
- Business license for operating in your city.
- Fire safety inspection for propane and hood systems.
- Vehicle registration for road use.
Step 5: Install Utilities
A functional food trailer requires plumbing, electricity, and gas lines.
Plumbing:
- Freshwater tank (commonly 30–50 gallons).
- Wastewater tank (15% larger than freshwater tank).
- Triple-compartment sink and separate handwashing sink.
Electrical:
- Generator or shore power connection.
- Adequate outlets for appliances.
- LED lighting for energy efficiency.
Gas (if using propane):
- Secure propane tanks in ventilated compartments.
- Certified gas lines and regulators.
Step 6: Equip Your Trailer
The equipment you choose will depend on your menu.
Common equipment includes:
- Grills, fryers, or ovens.
- Refrigerators and freezers.
- Prep tables and cutting surfaces.
- Food warmers and steam tables.
When buying equipment, look for commercial-grade appliances that meet NSF (National Sanitation Foundation) standards.
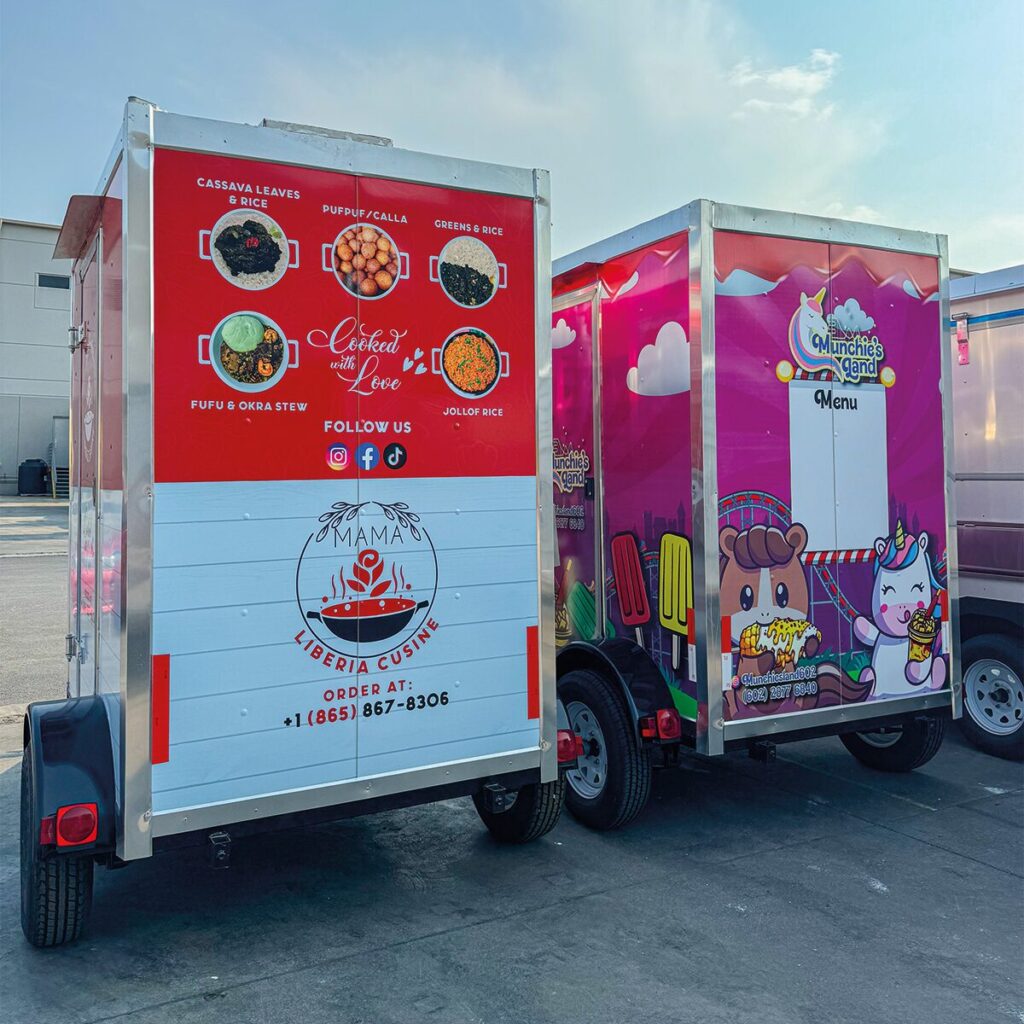
Step 7: Branding and Exterior Design
Your food trailer’s look is your first impression.
Branding tips:
- Use bold, readable lettering.
- Include your logo, social media handles, and menu highlights.
- Choose colors that reflect your cuisine style.
- Consider a professional wrap for durability and visibility.
Step 8: Safety and Compliance Checks
Before hitting the road, your trailer must pass all safety inspections:
- Fire suppression system check.
- Electrical and gas safety tests.
- Health department final inspection.
Step 9: Testing Before Launch
Do a soft opening before your official launch.
- Test your equipment under full service conditions.
- Train your staff on workflow and safety protocols.
- Adjust menu items based on prep time and demand.
Step 10: Launch and Market Your Food Trailer
Once approved, it’s time to start serving customers.
- Park in high-traffic areas.
- Join local festivals and events.
- Build a strong social media presence.
- Offer limited-time specials to attract new customers.
Estimated Cost of Building a Food Trailer
While costs vary widely, here’s a rough breakdown for beginners:
- Trailer base: $5,000 – $20,000
- Equipment: $8,000 – $30,000
- Utilities installation: $3,000 – $10,000
- Branding/wrap: $2,000 – $6,000
- Permits and licenses: $500 – $2,000
Final Thoughts on How to Build a Food Trailer
Learning how to build a food trailer is a rewarding process that gives you complete control over your mobile kitchen. By following these steps—from planning and permits to installation and branding—you will create a trailer. This trailer will meet regulations and stand out in a competitive food market.
If you want to start your food trailer journey, The Fud Trailer Company can help. They can design and build a custom unit that fits your needs and budget.
Contact Us now to start your project
